 If you have read Marie Kondo’s book, The Life Changing Magic of Tidying Up, you know how important it is to fill your house with items that bring you joy. Because of this, I am trying to get better about printing off favorite pictures for myself and for others. If we love the images displayed in our phones or camera, we will love the images displayed in our house.
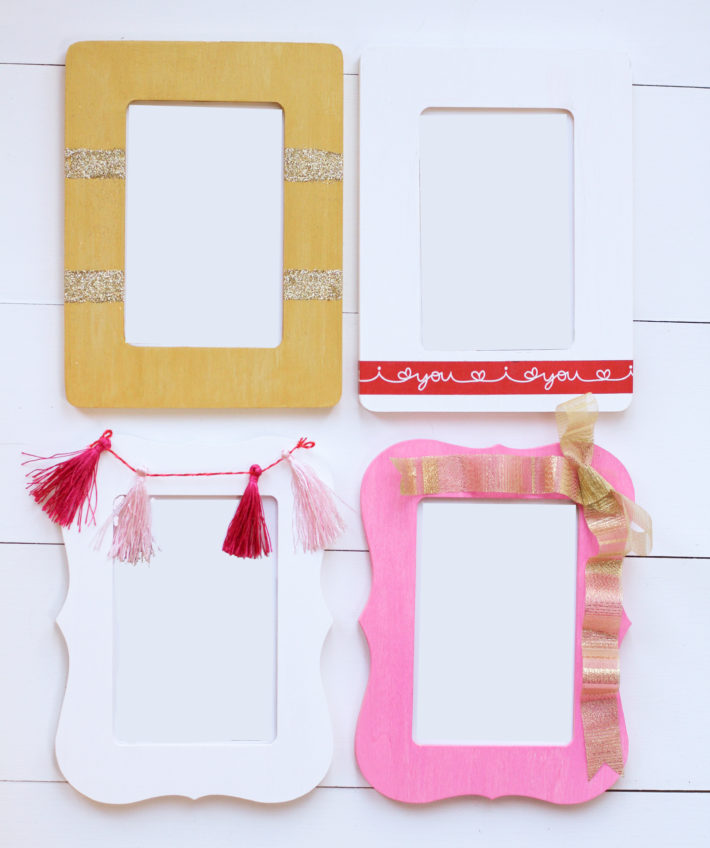
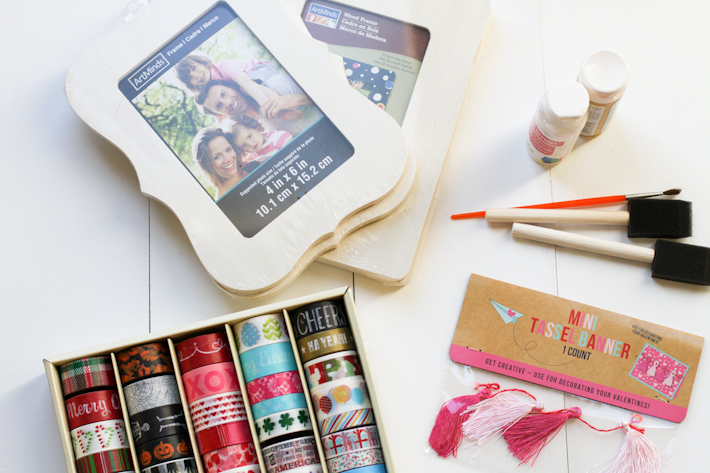
As a gift to my future sister-in-law and brother, I just had several of their engagement portraits printed. My mom and I decided to personalize a few frames to give with the portraits. We bought basic wooden frames and supplies from the craft store, and created four styles of frames over wine and queso. Does life get much better than that?!
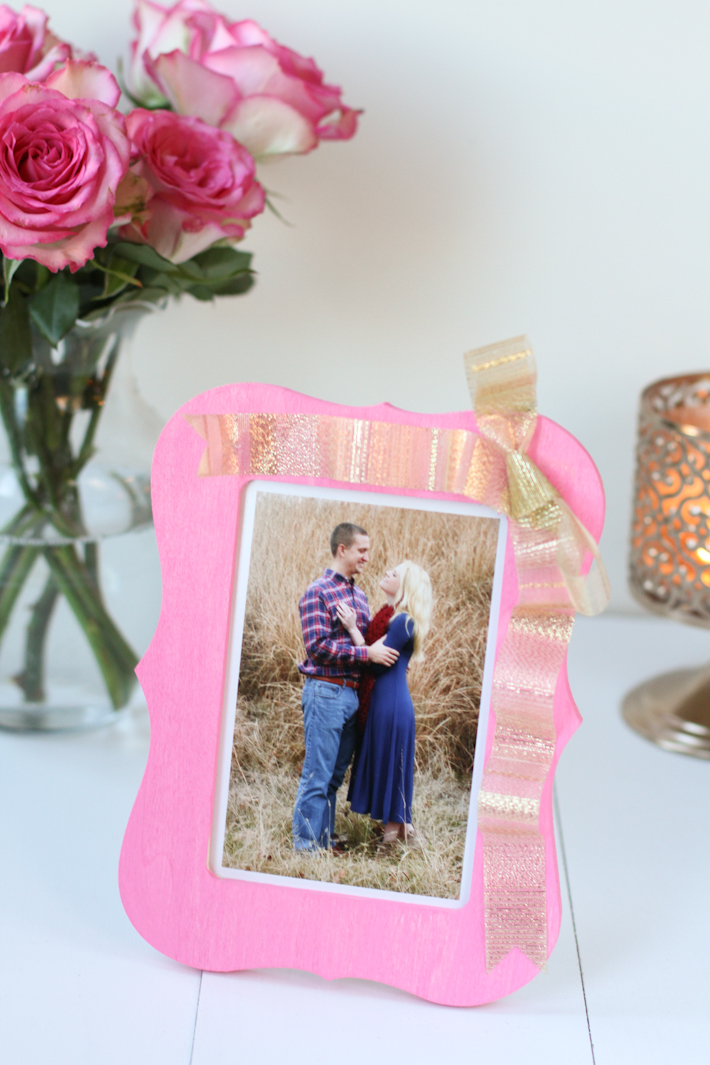 Ribbon Frame
Paint the frame your desired color and allow it to dry. Tie a bow with ribbon and leave two long tails. Attach the bow to the frame. (This can be the tricky part – depending on the ribbon’s material it may not glue easily. I tried three glues and ultimately wood glue worked best.) Glue the tails of the ribbon every couple of inches along the frame. Trim the ends.
This would also look cute with burlap ribbon or twine wrapped several times around the frame.
 Scrapbook Embellishments
This was so easy! I painted the frame white and used this miniature garland made for scrapbooks to decorate the frame. Many different scrapbook embellishments would work – from chipboard patterns, to rhinestones, to lettering. Look in your craft store’s scrapbook aisle for several options. The best part: most of these already have adhesive on the back to make assembly easy!
 Washi Tape
Pick out your favorite washi tape. Paint the frame white and allow to dry. Place the washi tape onto the frame, either one strip of tape, or several rows of tape in a row.
 Glitter
Using painter’s tape or scotch tape, outline the borders for the where the glitter will be applied. Paint the area to be glittered with a decoupage glue (this is my favorite). Sprinkle fine glitter over the glue. Allow to dry. Seal the glitter with another coat of decoupage glue.
In this picture, I painted the frame with metallic gold. However, I would recommend not painting the frame before hand as the glitter and glue do not adhere as well to the painted area. Paint the frame carefully after the glitter is dry.
Other Ideas
The possibilities are endless for creating frames. Apply chalkboard paint to frame and gift with a piece of chalk to create a frame that can always be changed. Glue on sequins or buttons to a couple corners of the frame for a glitzy portrait.
If pictures bring joy to you and family, print out your beautiful pictures and keep them on display! For more ideas on how to display pictures, I have a Pinterest page with examples on how to decorate with portraits.
Live your life joyfully so,
Ashley