
Hello! So excited for this time of year – between Halloween, gatherings, Thanksgiving and Christmas – in my opinion, this truly is the most wonderful time of the year! This weekend was so much fun with a barbecue, hockey game, football game and lots of laughter. For the barbecue, I pieced together this cake that is so fun and relatively easy to assemble. In summary, it’s two bundt cakes layered together, filled with candy and topped with an ice cream cone (for the pumpkin stem) – to create a delicious pumpkin. Kids get so excited when it is cut open and candy pours out! And it doubles as a cute centerpiece for a fun get together. If you are like me, you will love this yummy and clever pumpkin piñata cake!
Just a little note: I cannot take credit for the idea for this cake but was inspired by someone else (shout out to Mrs. Hoagie!). I apologize, the pictures are not my usual quality due to a time crunch and using my phone with kitchen lighting. Don’t let the photography fool you though, this pumpkin piñata cake is so fun!
Pumpkin Piñata Cake
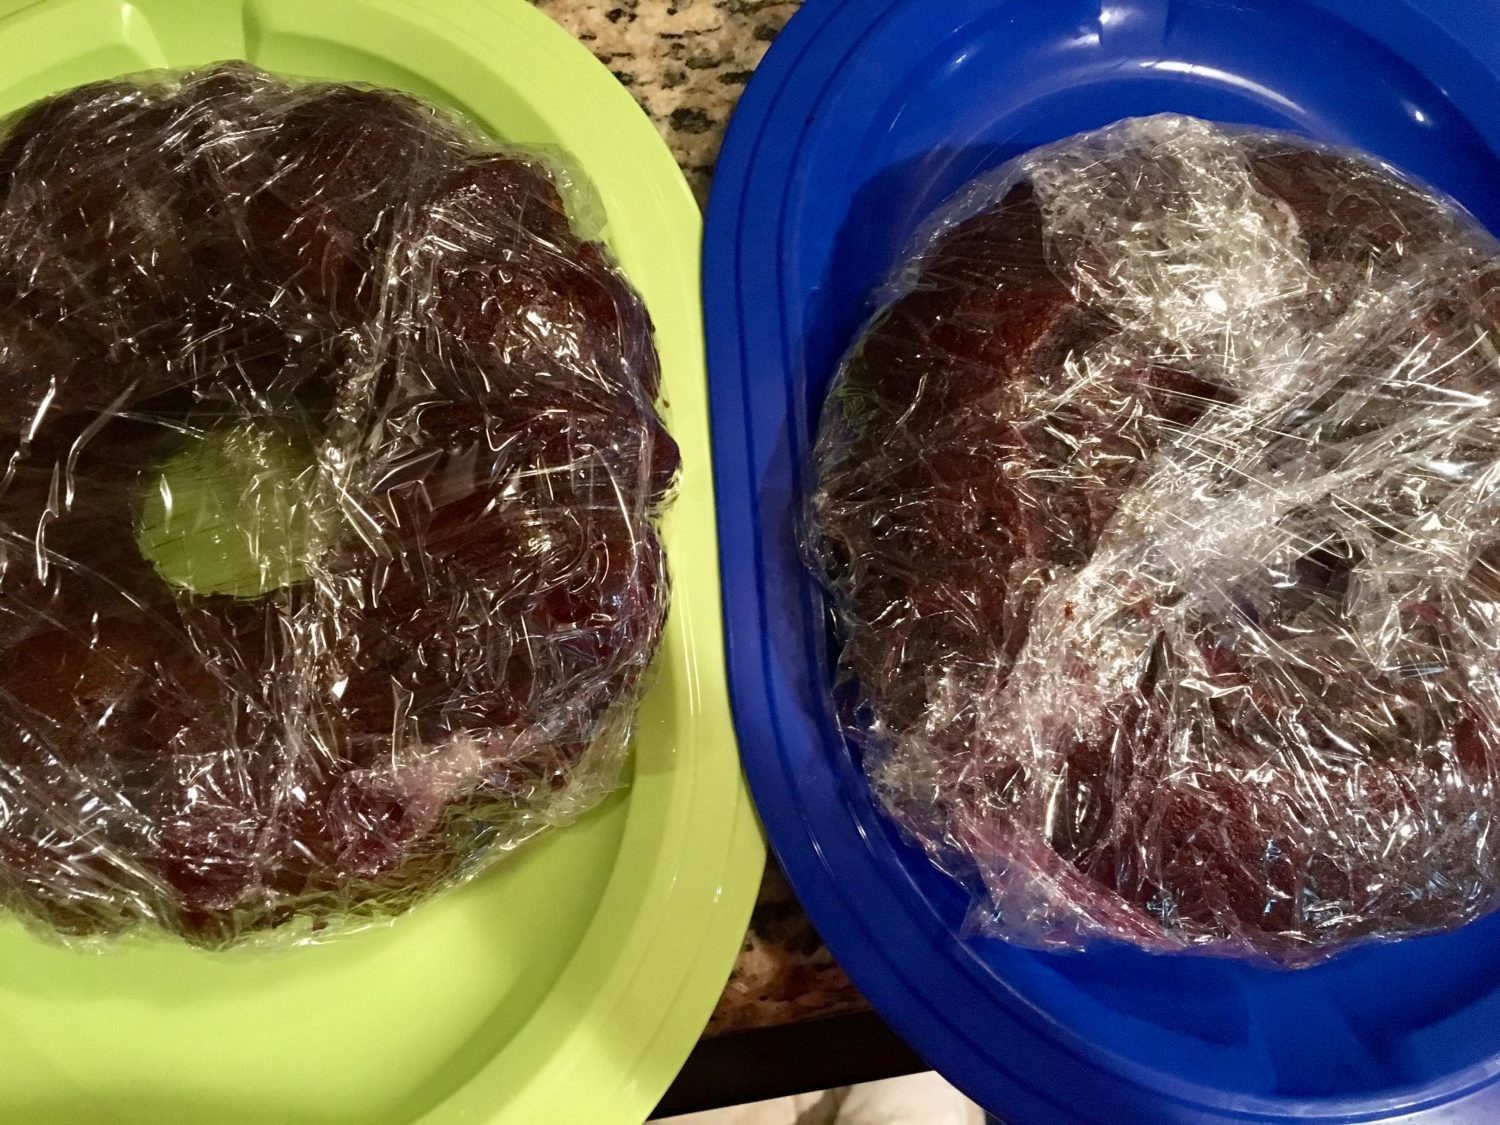
Step one: Bake two bundt cakes in the flavor of your choice, following directions on packaging. Allow each cake to fully cool before removing it from the pan. (I did this step the night before, and applied plastic wrap to keep fresh.)
Step two: Trim off a ~1 inch layer of the non-textured part of the cake. In other words, you want the two cakes to pair together nicely. Leave the bumpy edges intact as they will serve at the bottom and top half of the pumpkin.

Step three: Create the frosting for the pumpkin. Place 1.5 canisters of frosting in a bowl. Using food coloring, create the color of choice for your pumpkin. I mixed red and yellow dye until it became the perfect orange pumpkin shade.
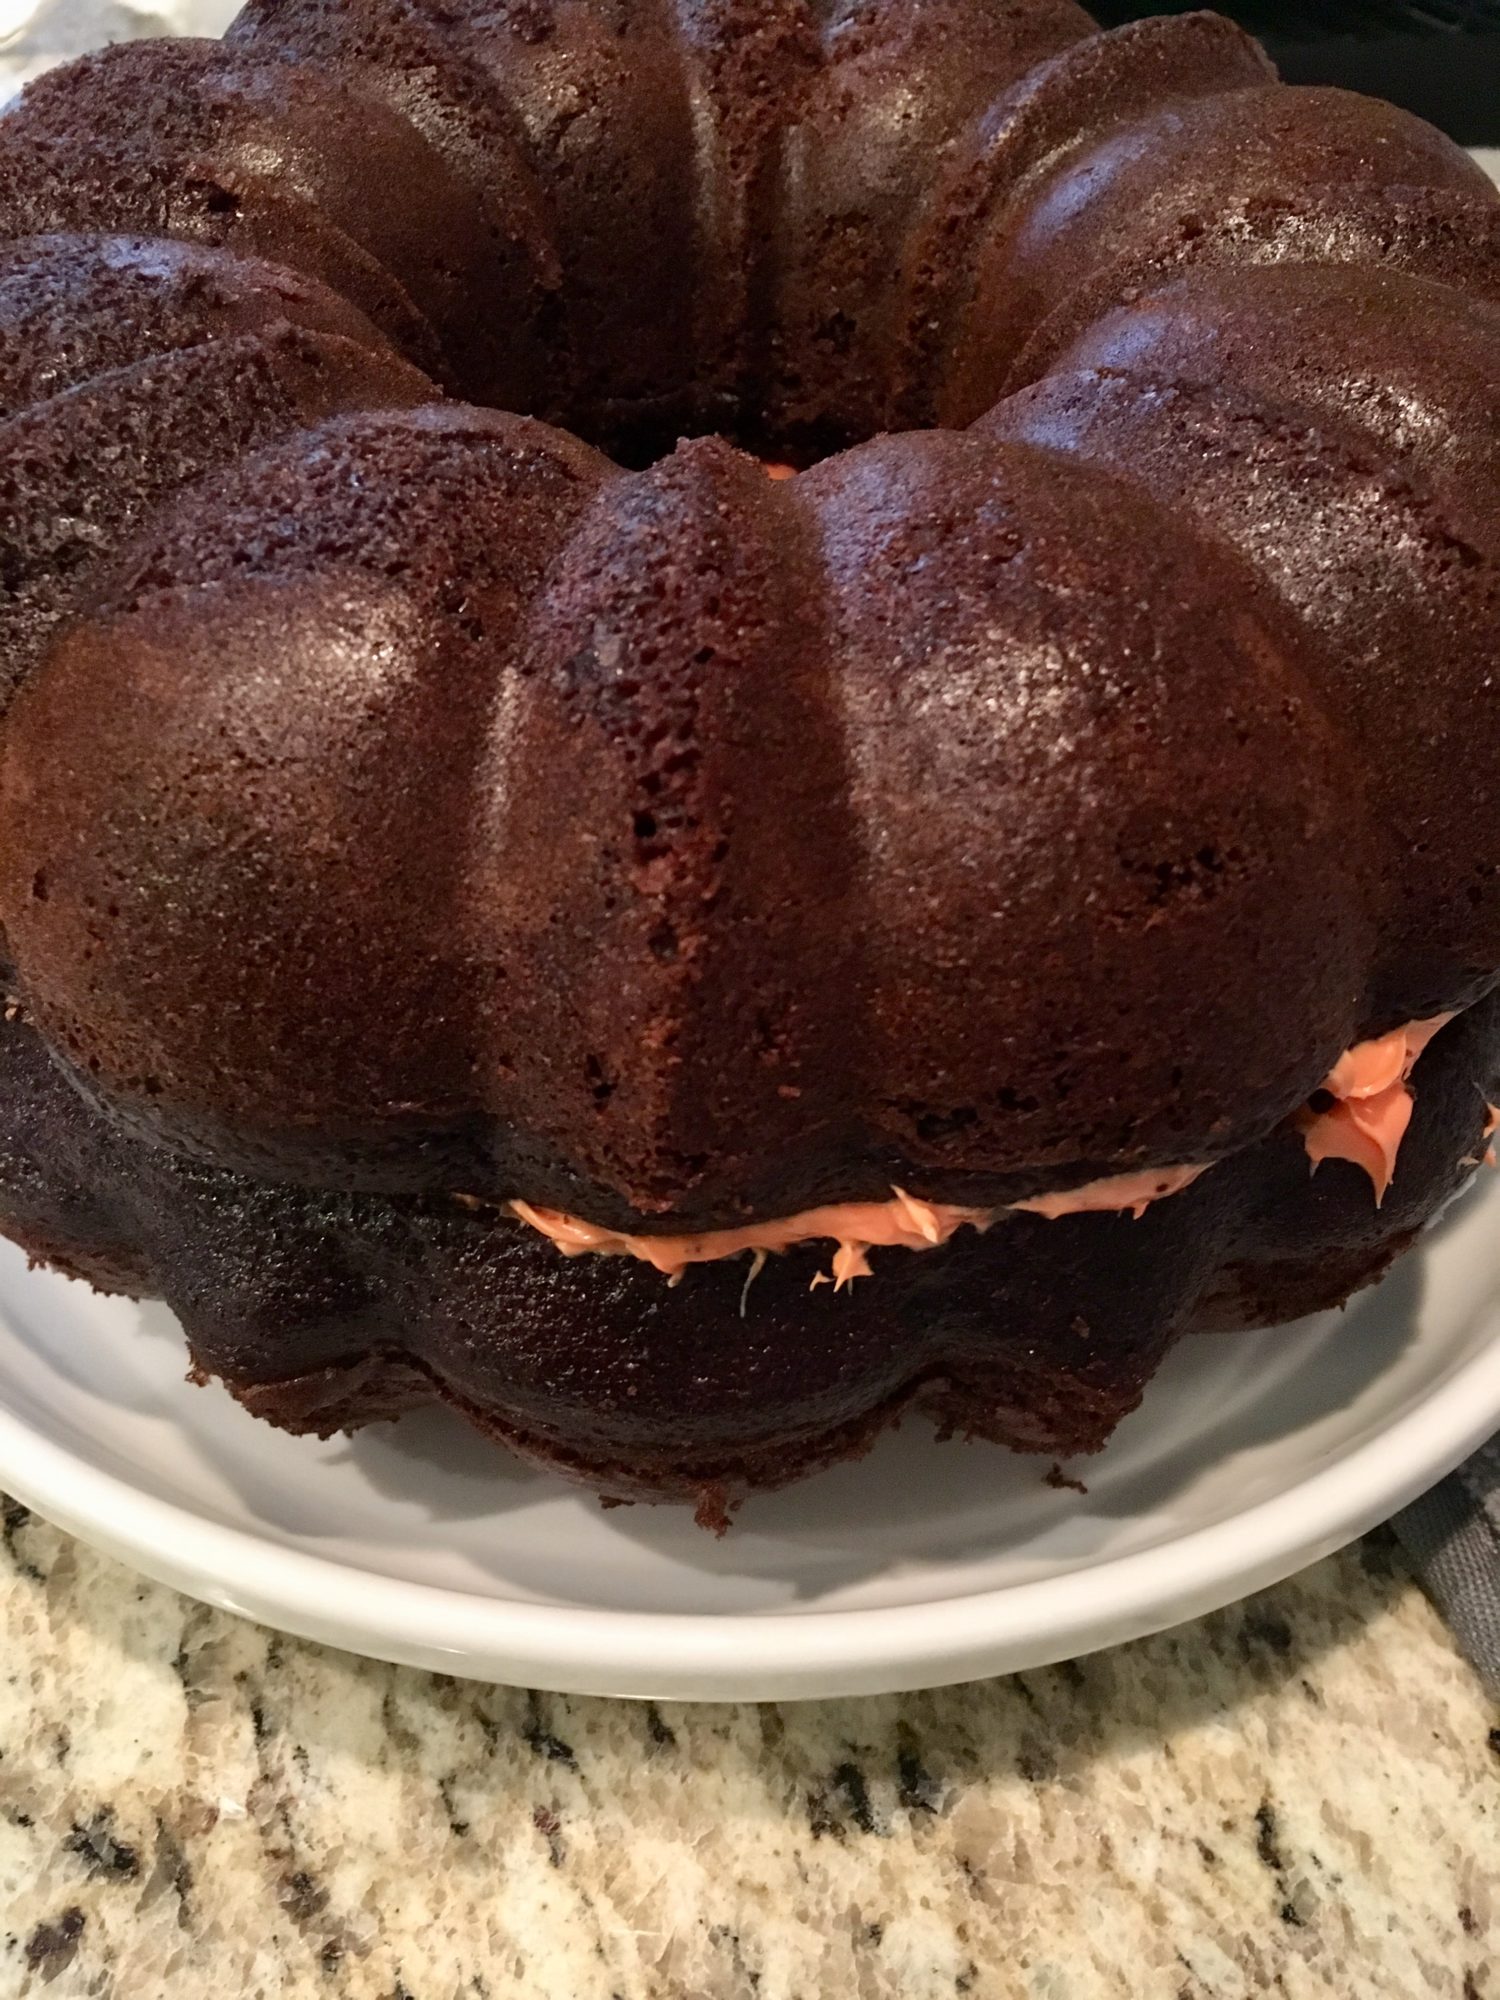
Step four: Place a thin layer of frosting between the two cakes. Arrange the cake layers on top of each other to form the pumpkin, with bumpy edges on the top and bottom of the cake.
Step five: Using the dyed frosting, frost the exposed areas of the cake. Optional: create lines on the pumpkin that mimic a real pumpkin’s texture, by gently dragging a knife/toothpick from the top of the pumpkin to the bottom of the pumpkin, following the divots on the bundt cake.
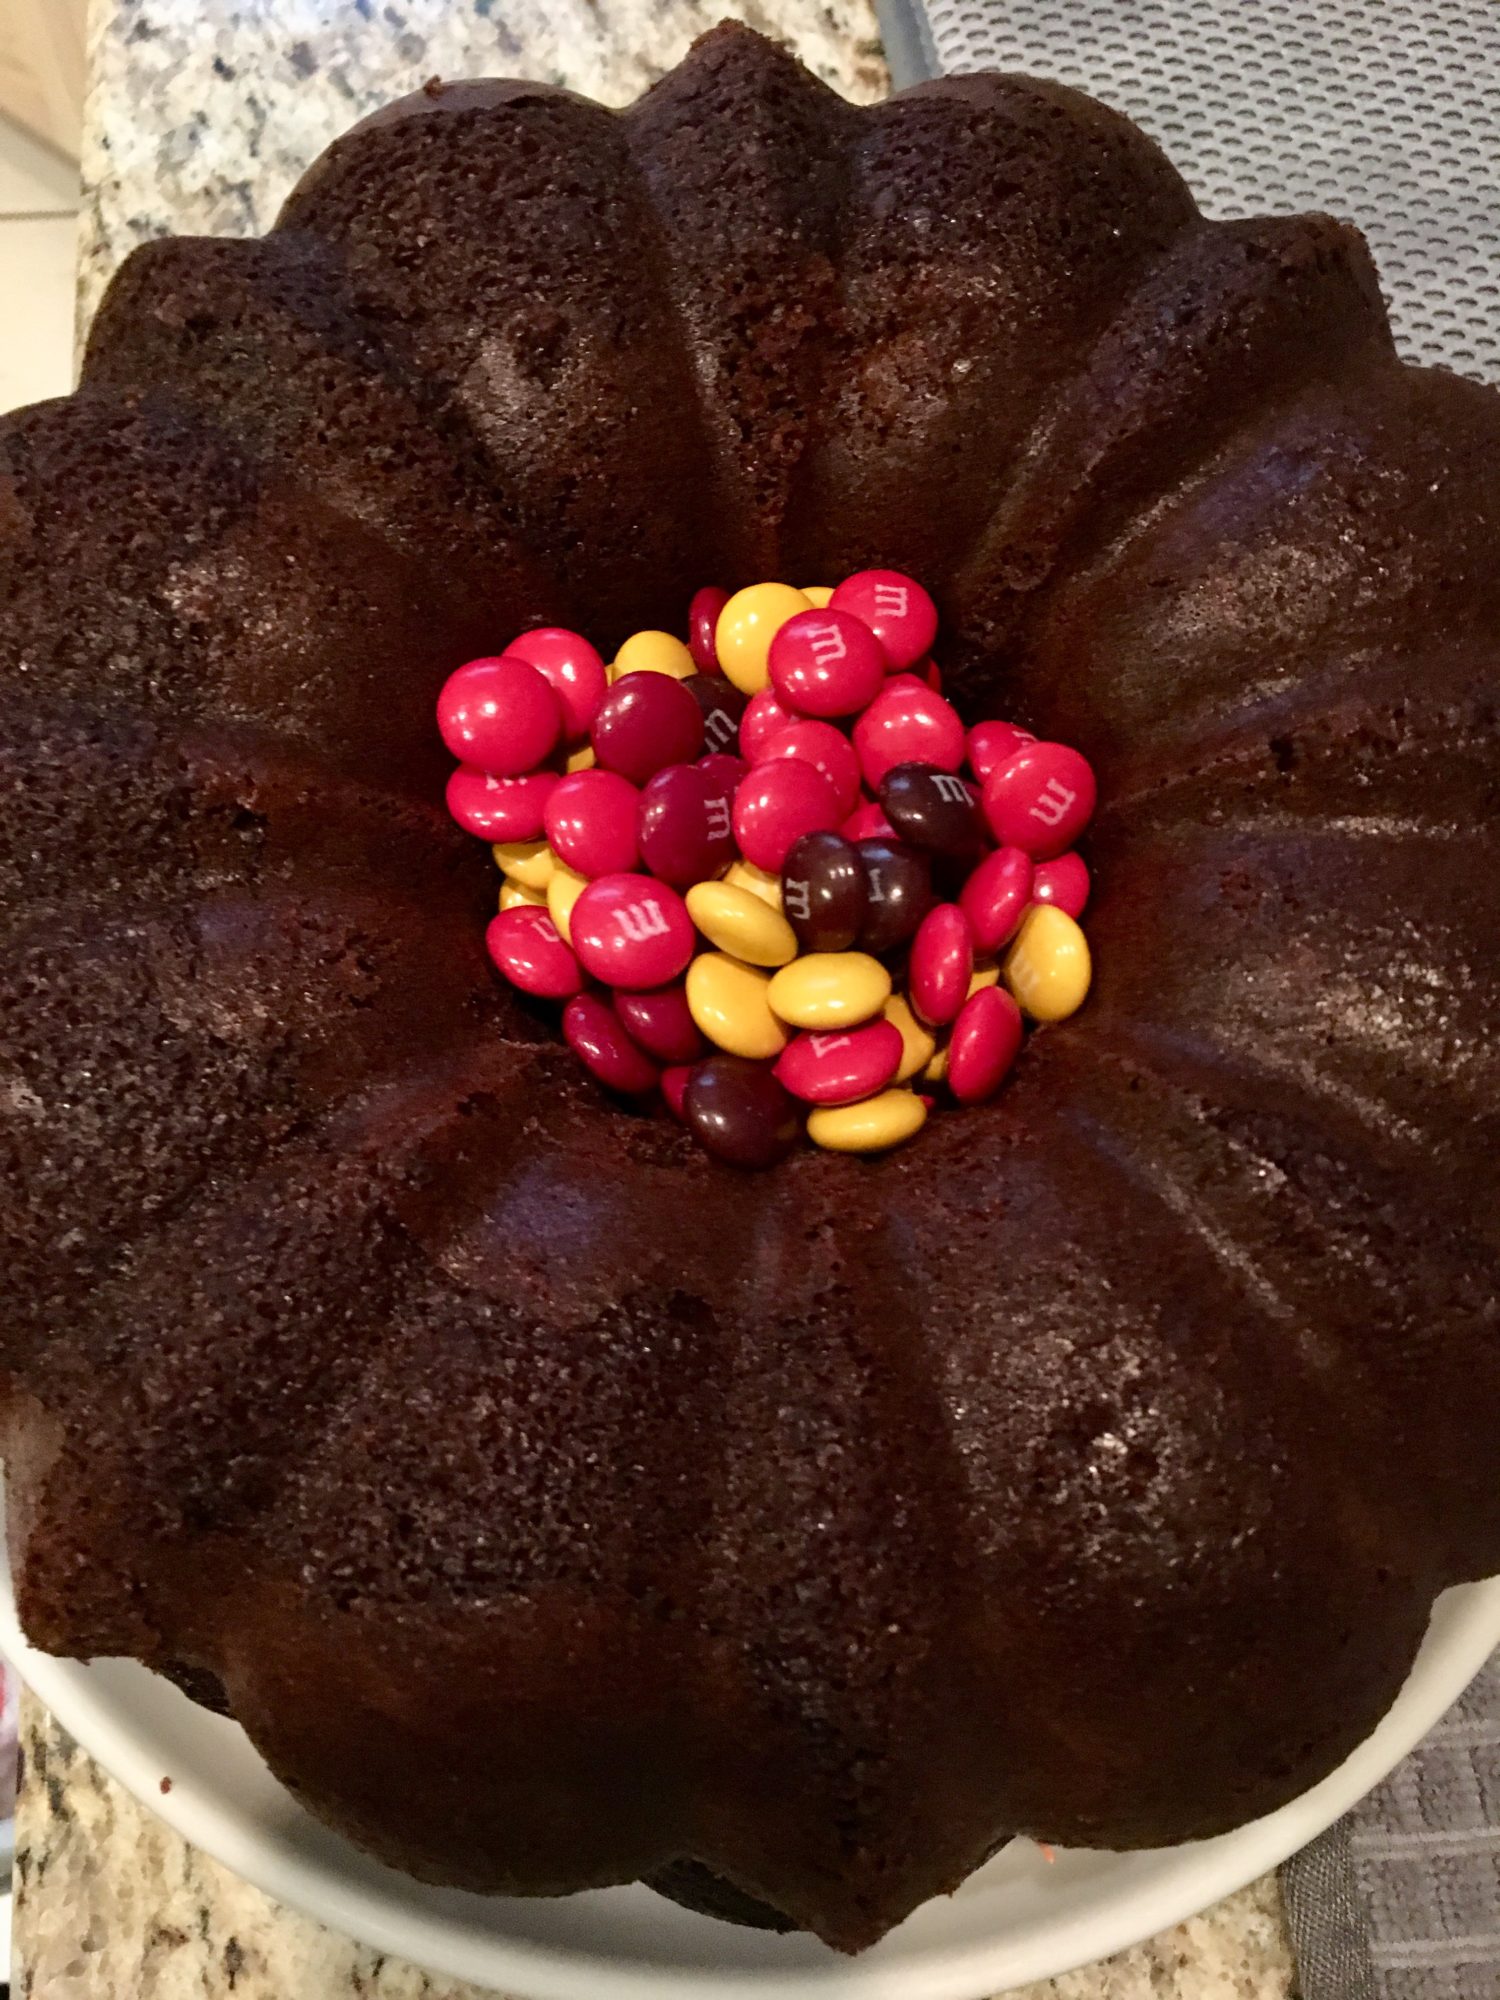
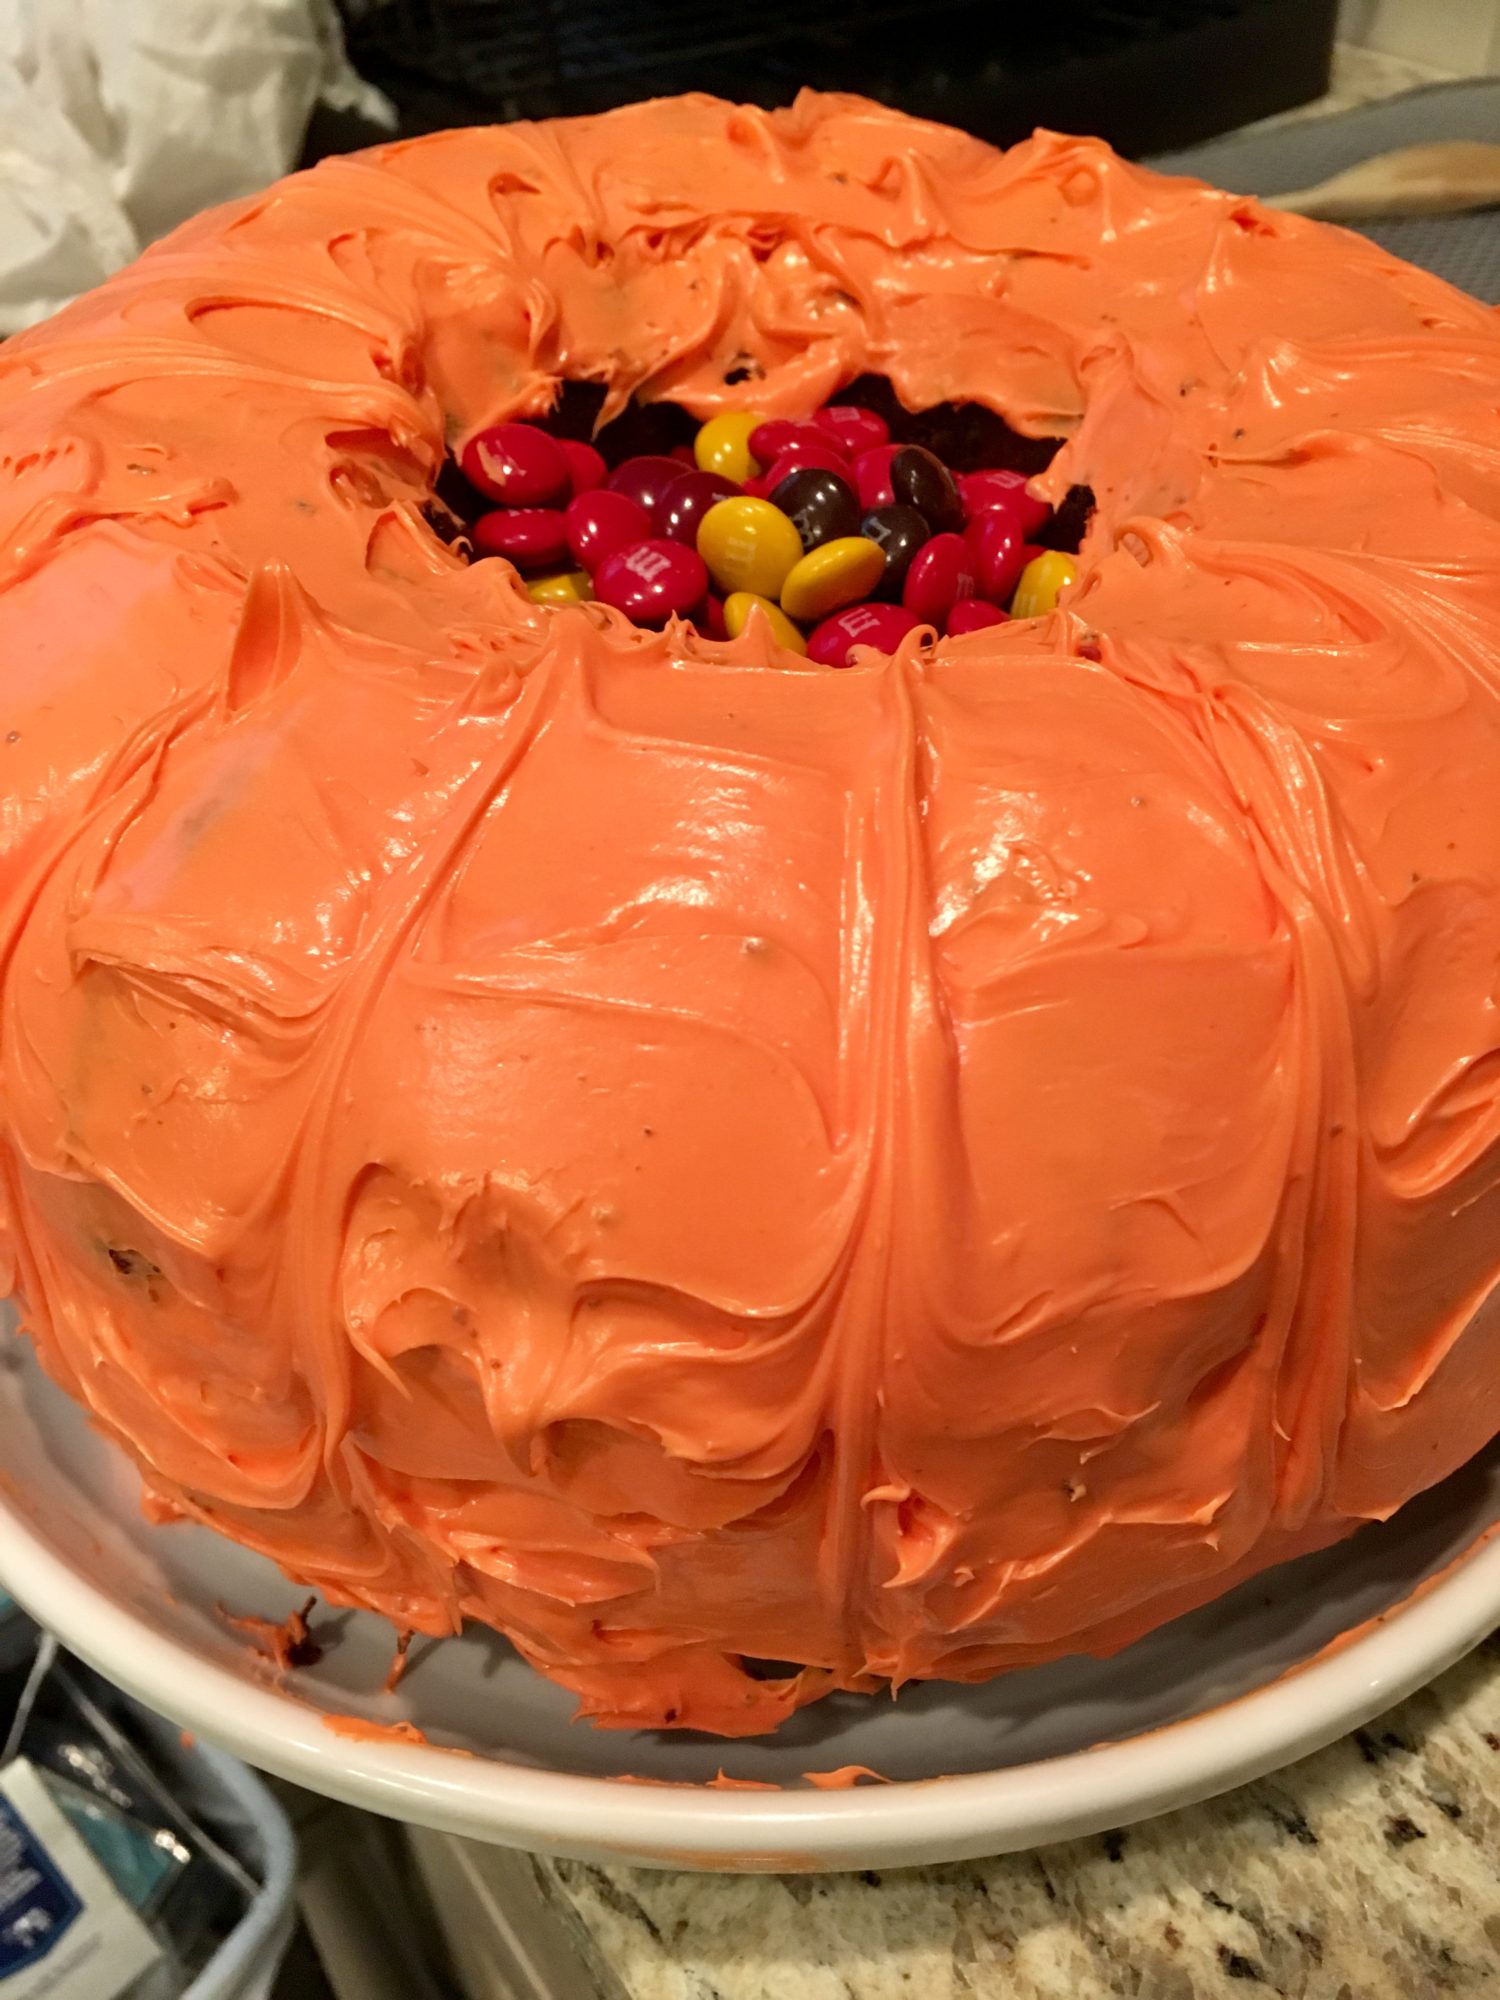
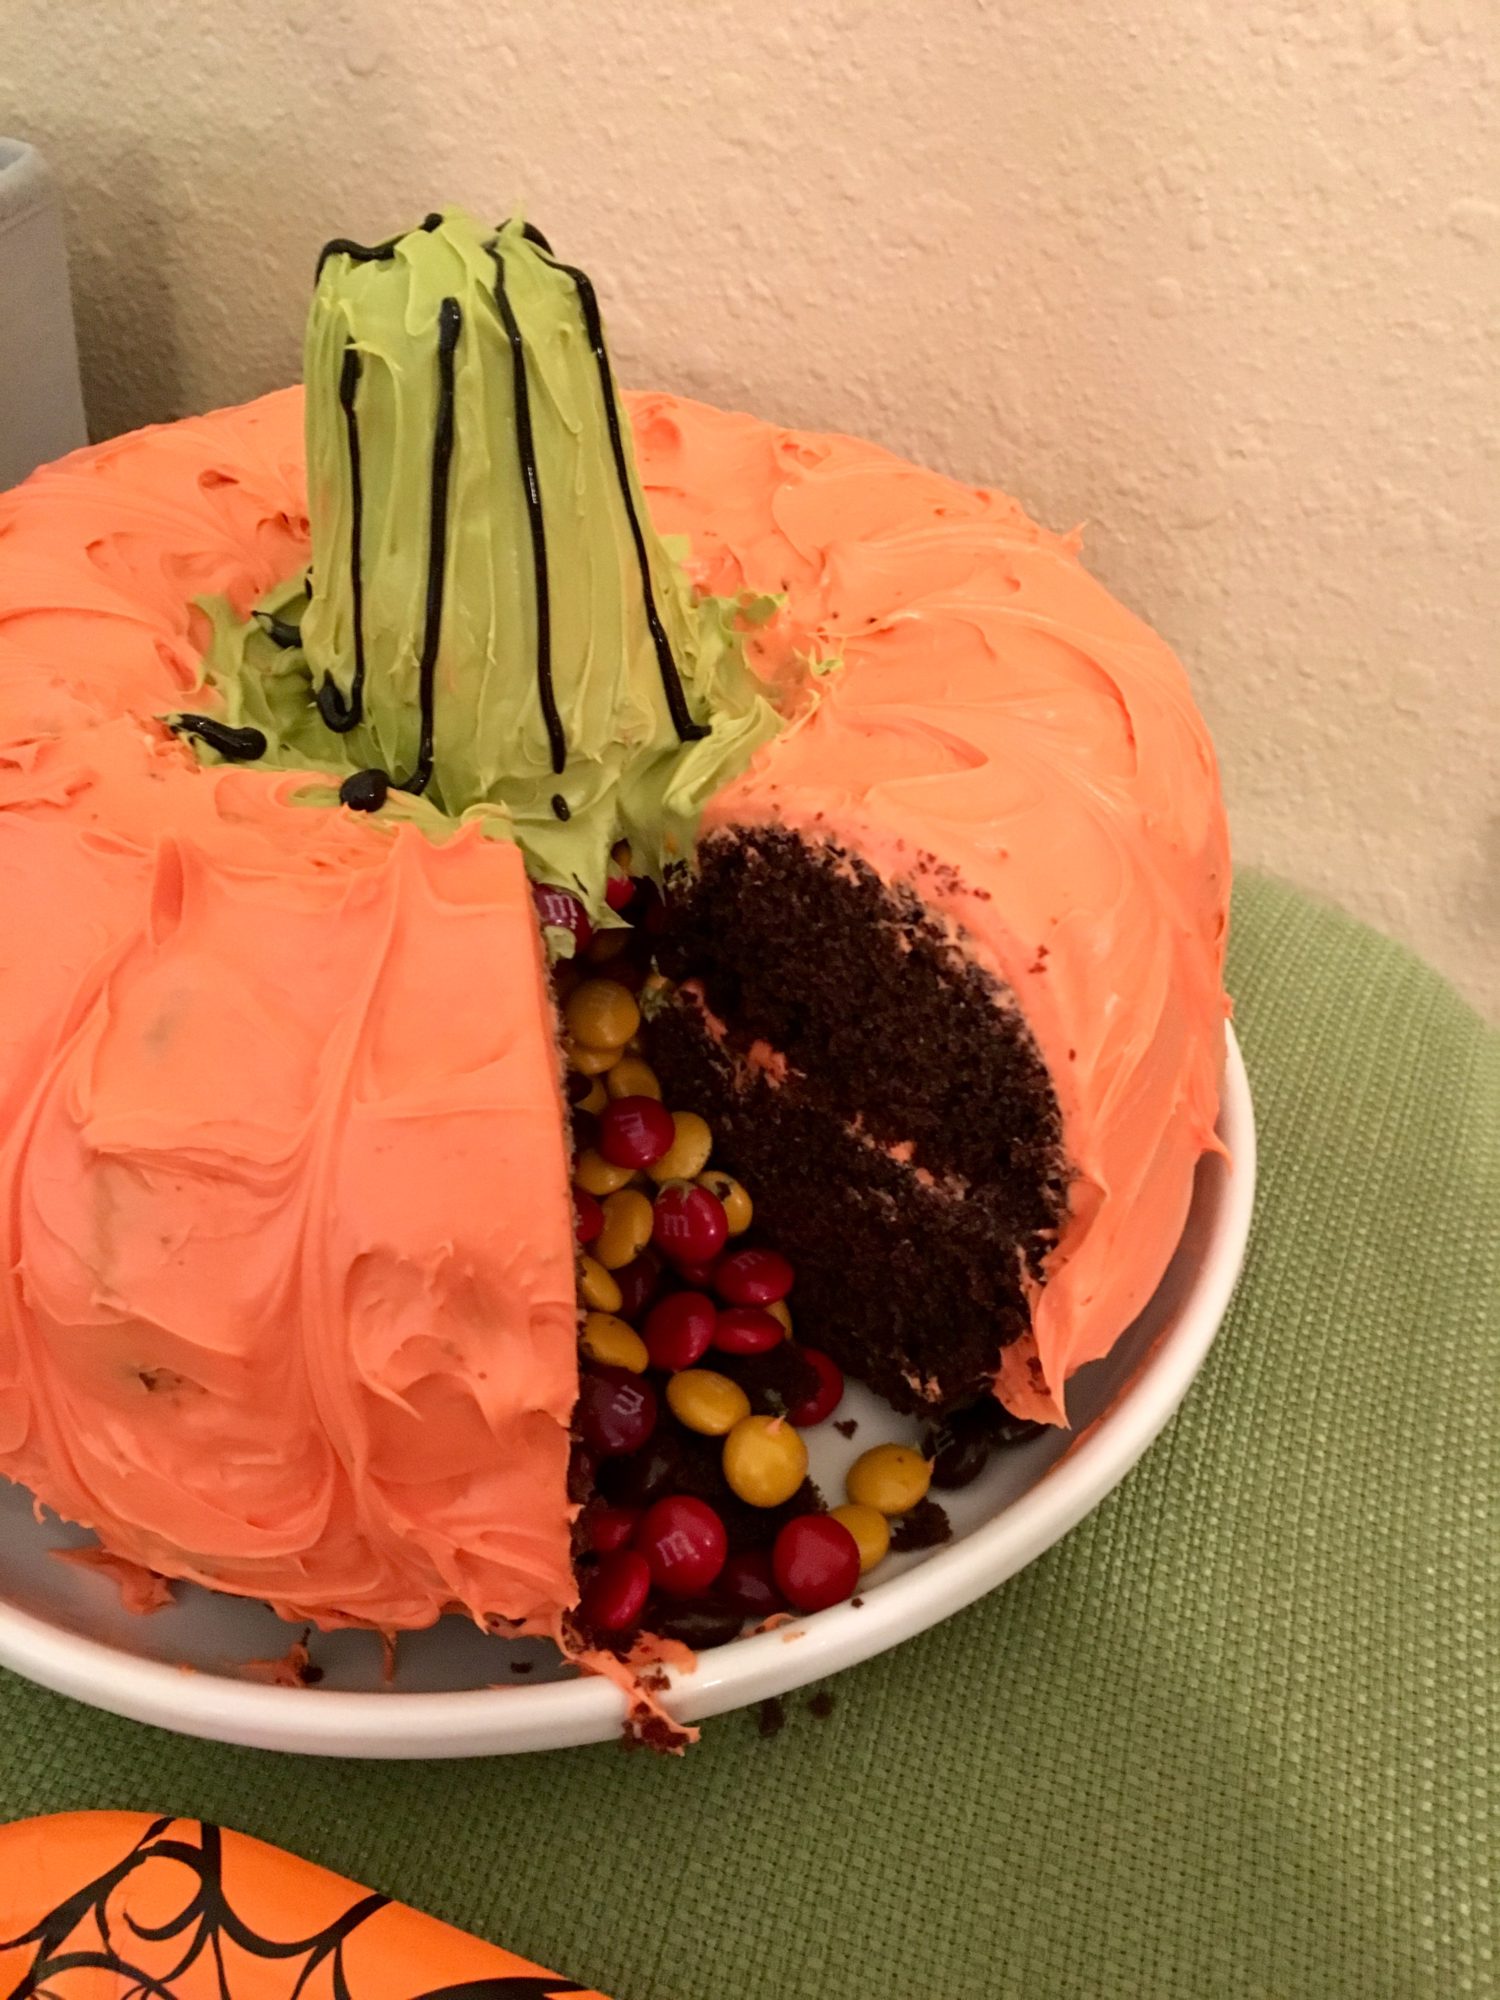
Step six: Add the candy into the center of the cake. Yesss! (Recommend doing this after the frosting is applied, not before as in the picture.)
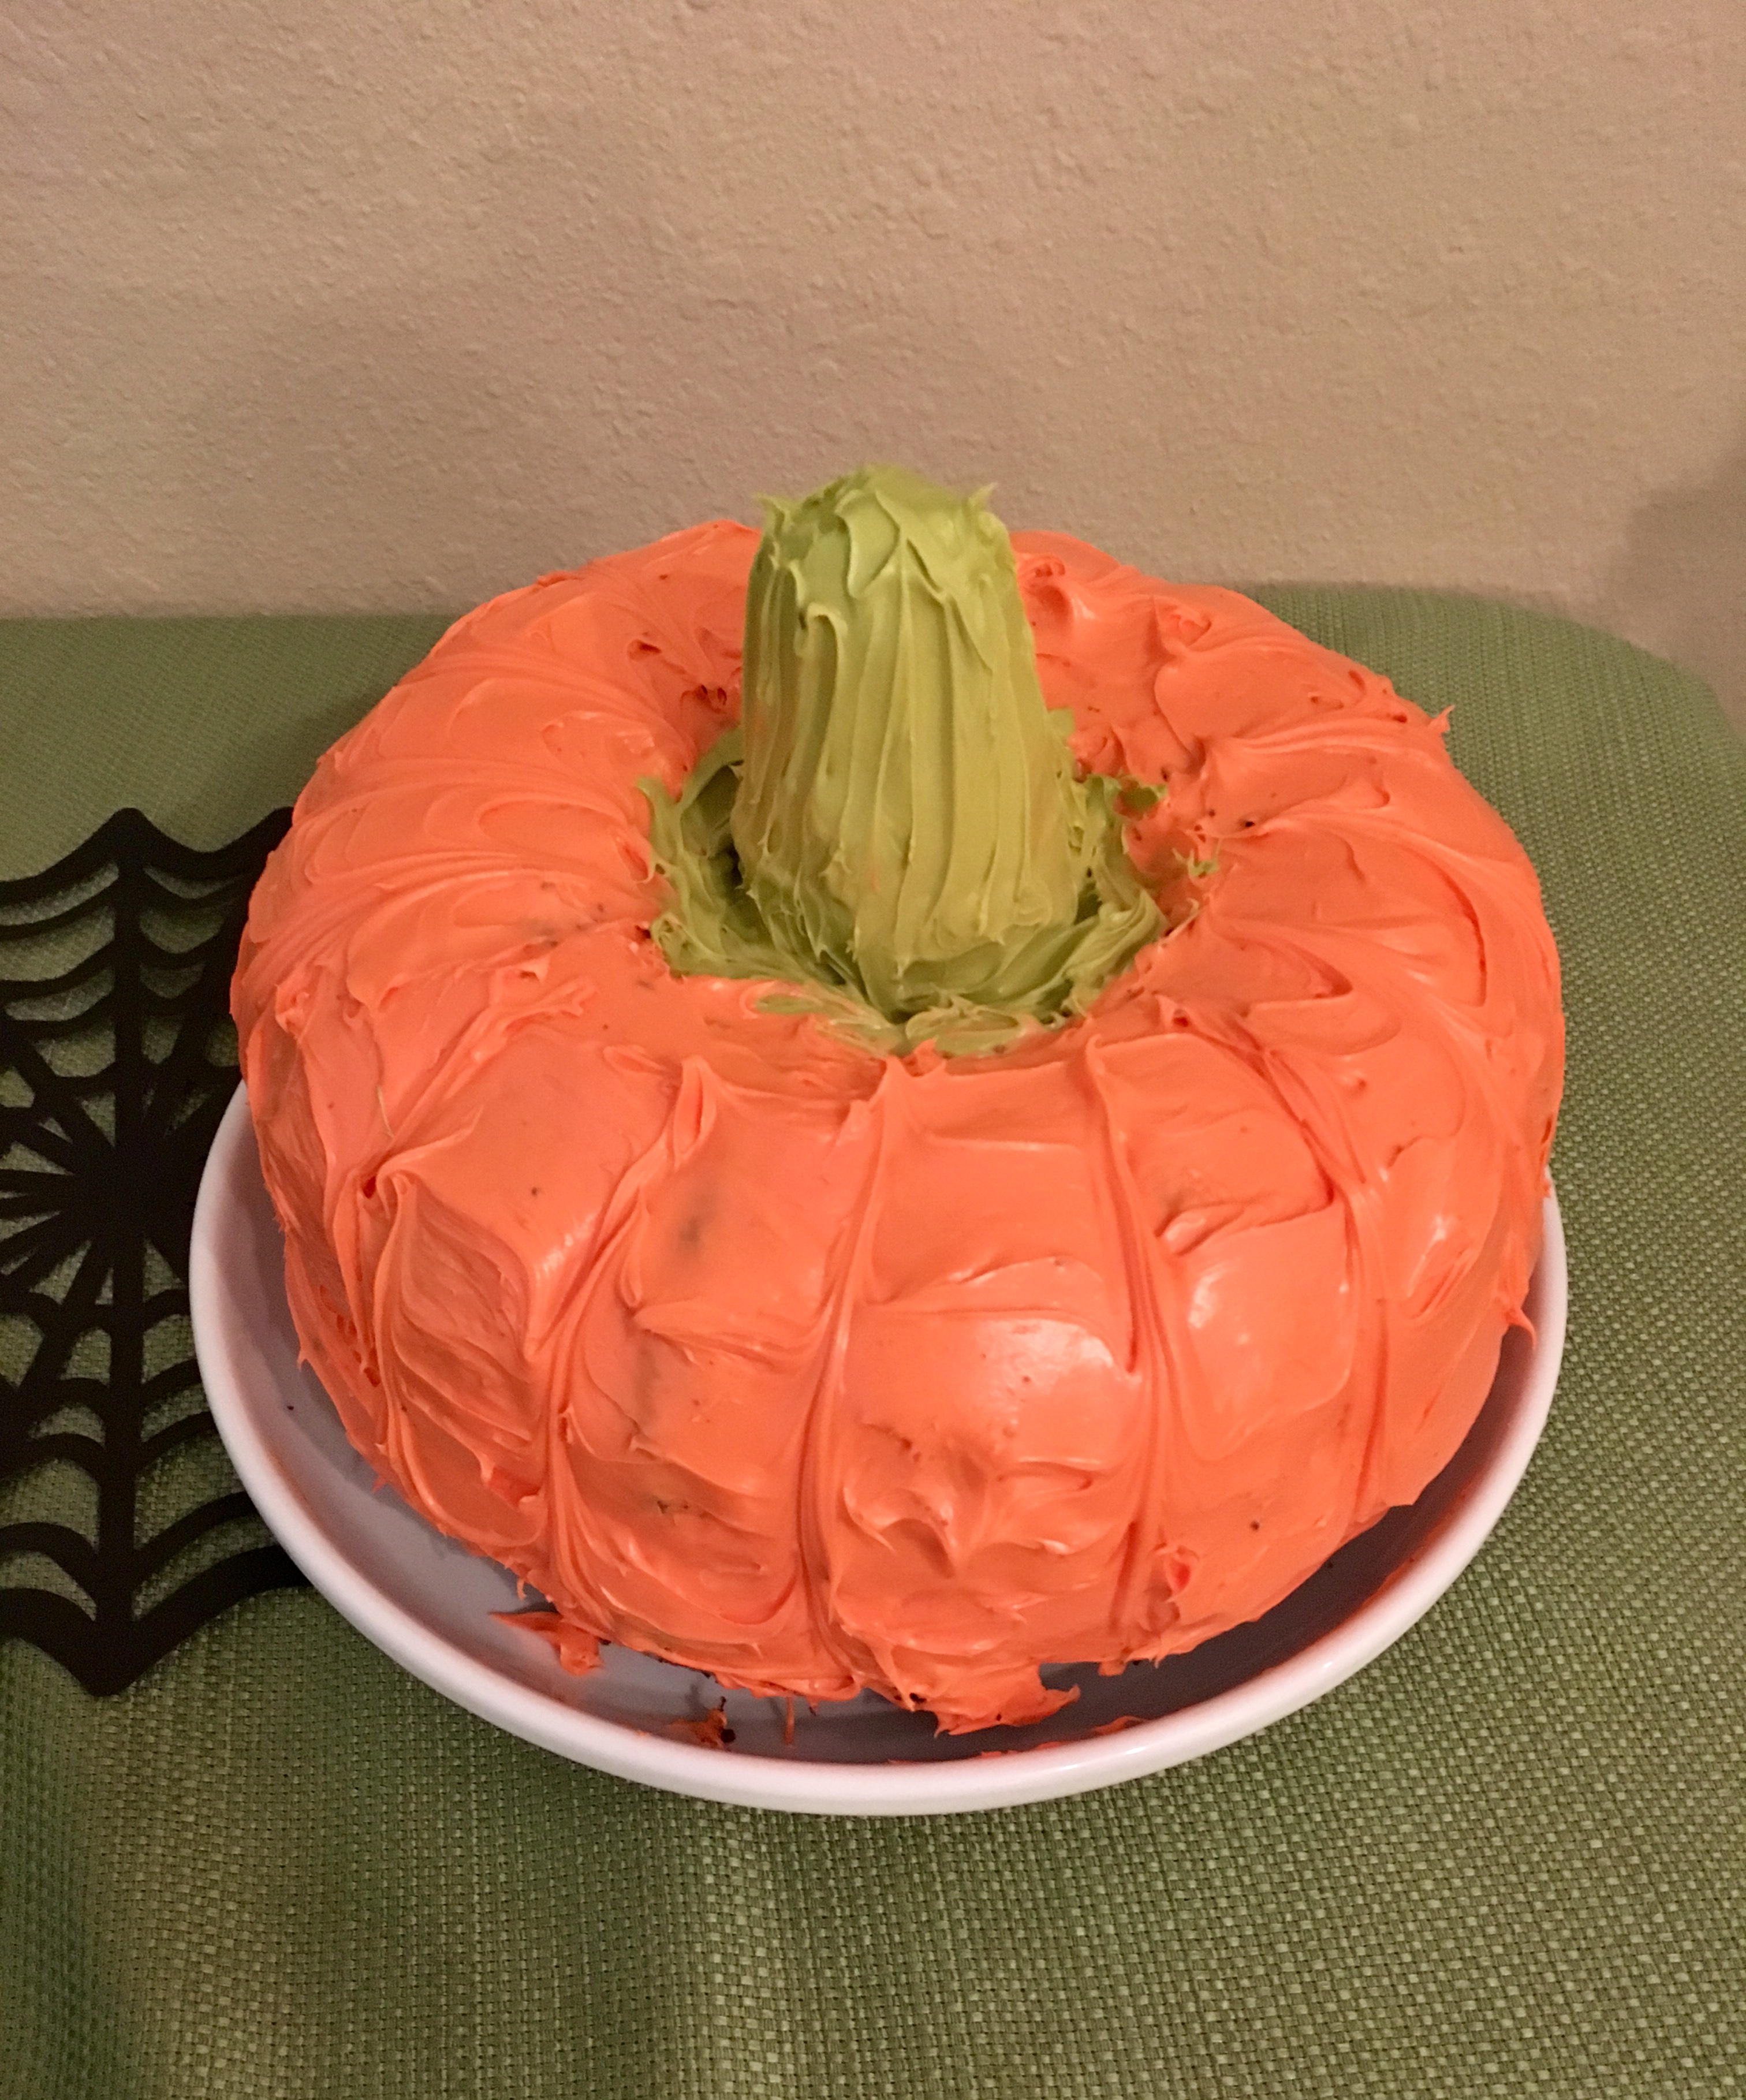
Step seven: Create the frosting for the stem. Dye the remaining frosting to your color of choice for the stem.
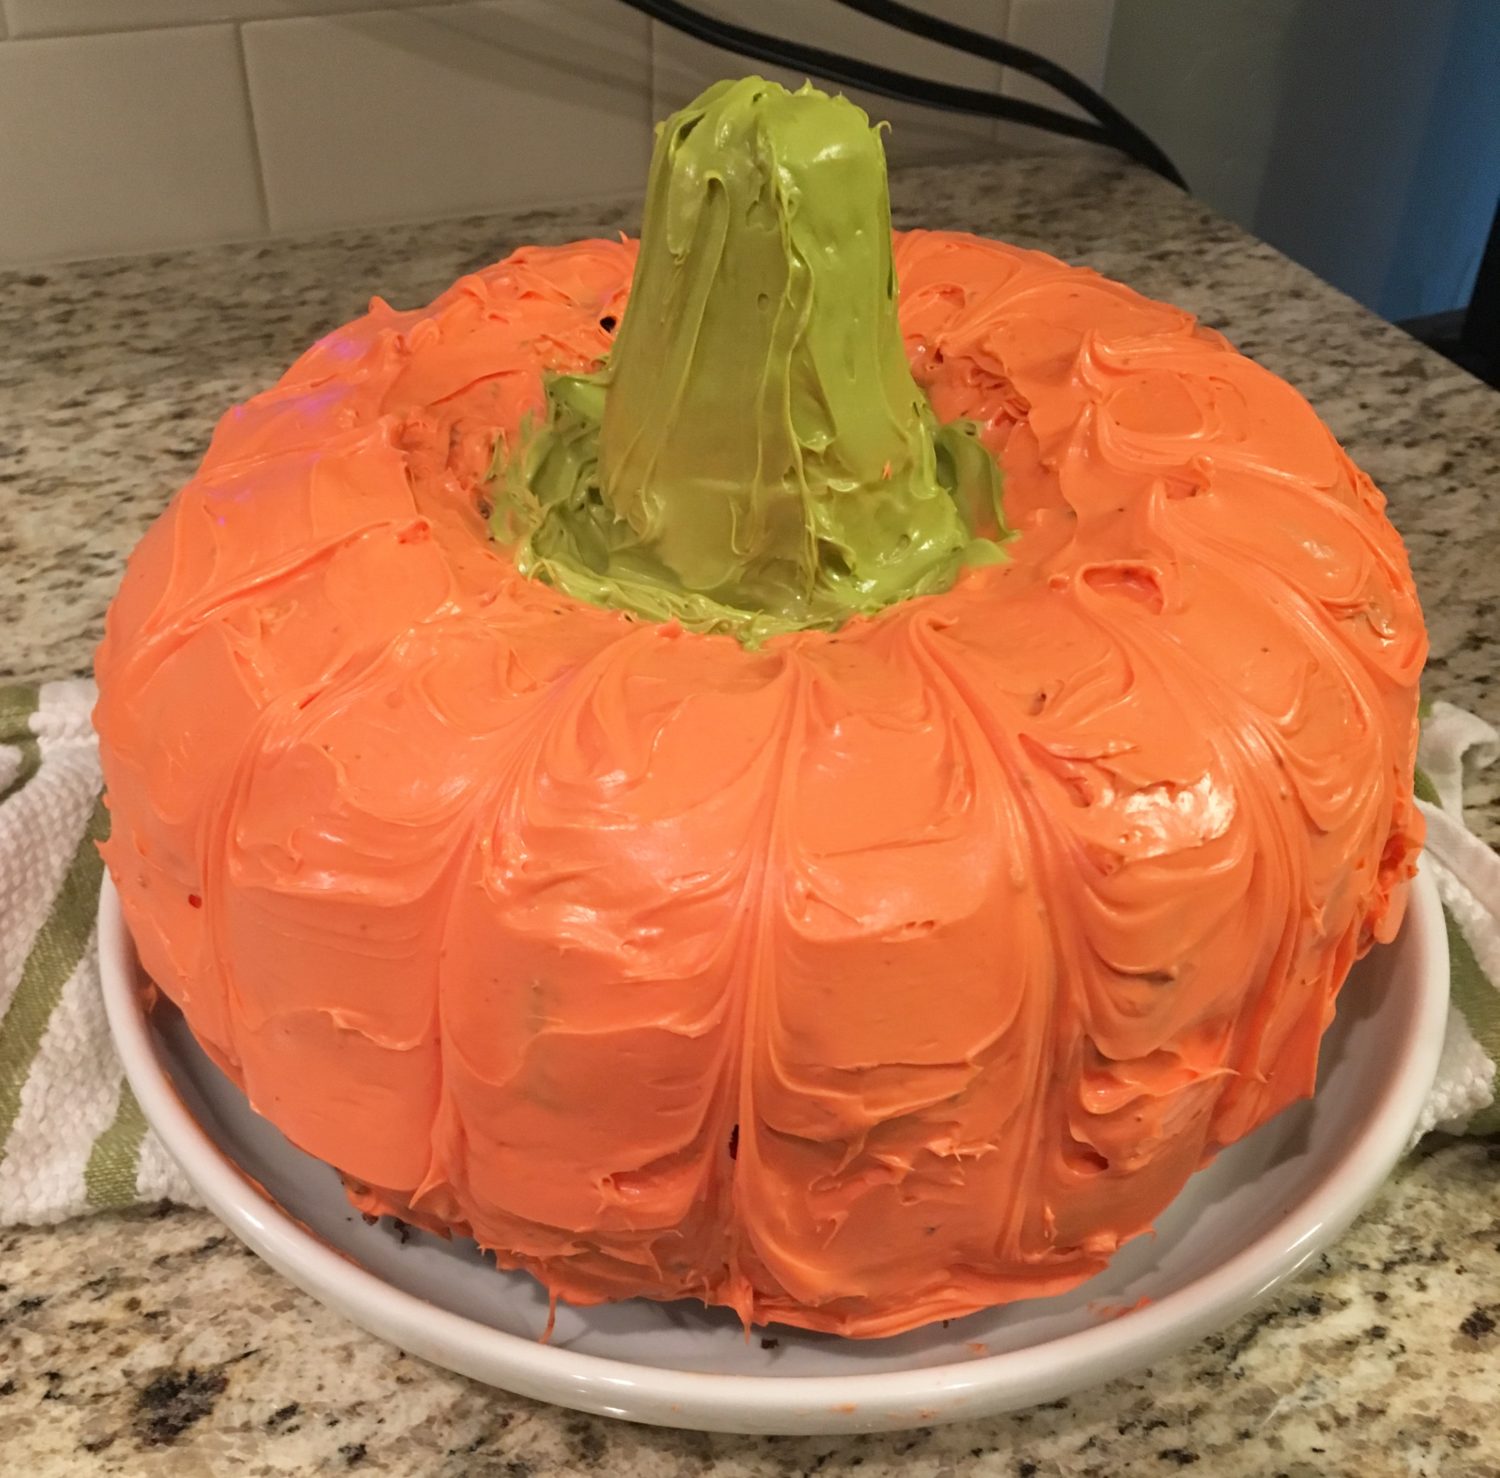
Step eight: Frost the exterior of the ice cream cone. Lay the ice cream cone on top of the center of the pumpkin, with the hollow part of the cone facing downwards.
Step nine (optional): Add a pumpkin face to make a jack o’lantern using frosting or fondant. Add details to the stem.
Enjoy!
Pumpkin Piñata Cake
Ingredients
- Two packages of cake mix in the flavor of your choice (plus eggs, oil and water per package instructions)
- Two canisters of white frosting (3/4 of this will be dyed for the pumpkin, 1/4 dyed for the stem)
- Food coloring
- Filler candy
- One ice cream cone
- Additional frosting or fondant for decorating the pumpkin
Supplies:
- Bundt cake pan
- Oven
- Measuring cups
- Mixing bowls and spoons
- Cake stand or platter
- Knife or spatula
Directions
- Bake two bundt cakes in the cake flavor of your choice, following directions on packaging. Allow each cake to fully cool before removing it from the pan.
- Trim off a ~1 inch layer of the non-textured part of the cake. In other words, you will want the two cakes to pair together nicely and cohesively to form the pumpkin. Leave the bumpy edges intact as they will serve to create the bottom and top halves of the pumpkin.
- Create the frosting for the pumpkin. Place 1.5 canisters of frosting in a bowl. Using food coloring, create the color of choice for your pumpkin. I mixed red and yellow dye until it became the perfect orange pumpkin shade.
- Place a thin layer of frosting between the two cakes. Arrange the cake layers on top of each other to form the pumpkin, with bumpy edges on the top and bottom of the cake.
- Using the dyed frosting, frost the exposed areas of the cake. Optional: create lines on the pumpkin that mimic a real pumpkin’s texture, by gently dragging a knife from the top of the pumpkin to the bottom of the pumpkin, following the natural divots on the bundt cake.
- Add the candy into the center of the cake. Yesss!
- Create the frosting for the stem. Dye the remaining frosting to your color of choice for the stem.
- Frost the exterior of the ice cream cone to create the pumpkin stem. Lay the ice cream cone on top of the center of the pumpkin, with the hollow part of the cone facing downwards.
- Optional: Add a pumpkin face to make a jack o’lantern using frosting or fondant. Add details to the stem.
Hope you have fun with this pumpkin piñata cake! Happy fall!
Live your life joyfully so,
Ashley