Hello friends! How are you doing today? After taking down all my Christmas decorations I realized I was left with a largely blank canvas. My doors and shelves were in need of a little seasonal TLC. Since moving into my new house in April, each season has been an opportunity to expand my holiday decor. With Valentine’s Day around the corner, this was the perfect time for a simple DIY Valentine’s Day wreath.
For this DIY, I wanted to keep it simple with basic materials: yarn and felt. The simplicity of this wreath and its homemade style reminds me of crafting Valentines for school. I always enjoyed the little personalized cards to give and receive from classmates.
So let’s get started on this fun DIY Valentine’s Day wreath tutorial!
 First, you need a round foam wreath, small ball of yarn and a little spray adhesive. Tie a knot to start the process. Wrap the yarn around tightly a few times. Spray a little adhesive over the knot and first few loops of yarn to ensure everything will stay in place.
 Continue wrapping the yarn really tightly all the way around the wreath. The loops should all be aligned closely next to each other.
After a full layer of yarn on the wreath, make a brief second pass with the yarn. I did one loop about every one centimeter to add a little extra texture and fullness to the wreath. Once finished, tie a knot with the yarn and one of the loops. Cut the strand of yarn and seal the knot with a little spray adhesive.
 To make the felt roses, I followed an easy tutorial here. Use a felt sheet to cut a square about 3-5 inches. For a large rose, cut a square about 7 inches. Don’t stress if it’s not a perfect square. Just like nature, little imperfections are embraced and will make each rose unique.
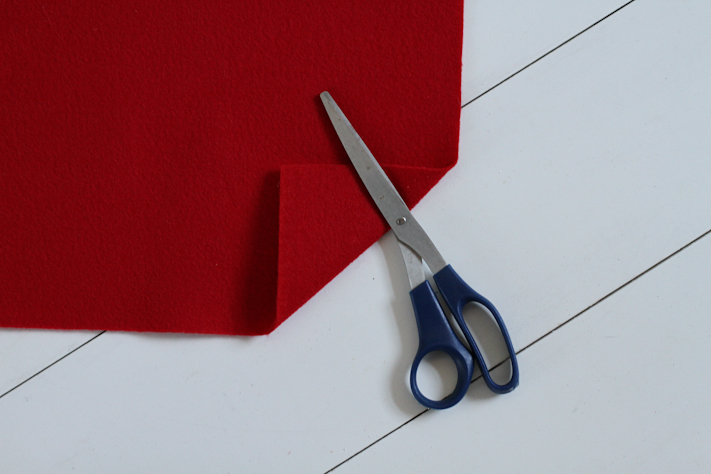
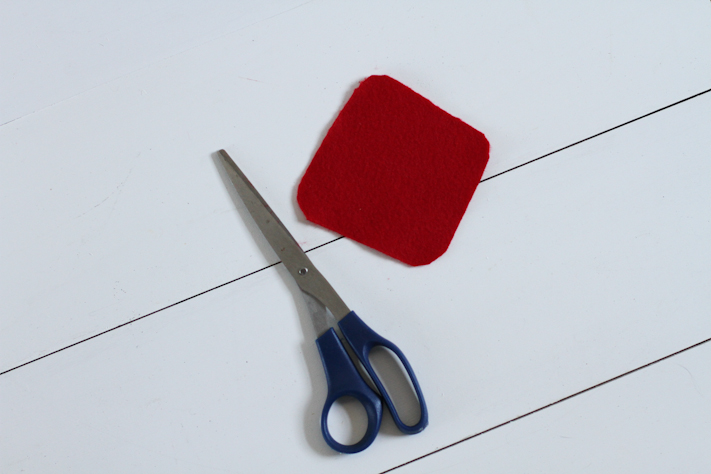 Create rounded edges, trimming the corners of the square.
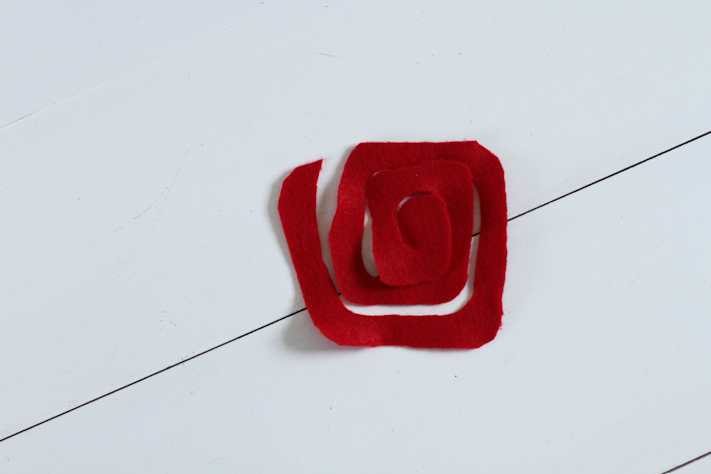 Cut a spiral pattern into the felt, leaving a little circle at the center of the spiral.
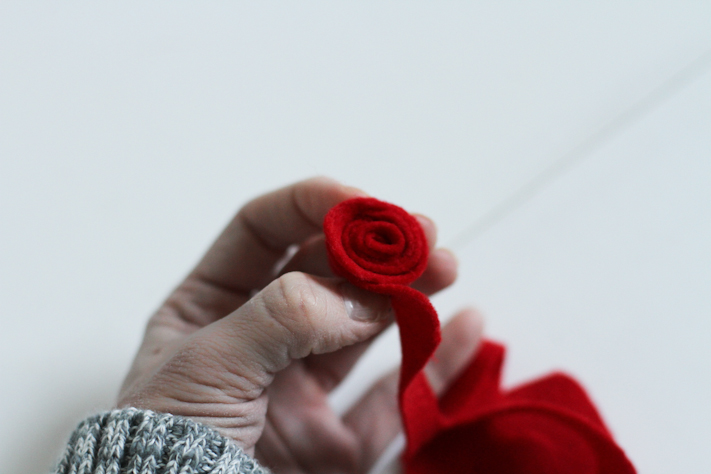 Start with the outside of the square and wrap the felt tightly into a roll. You will start to see the beautiful rose form!
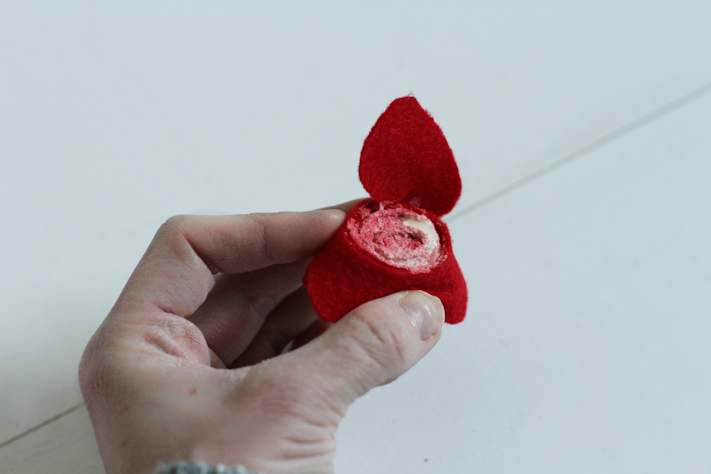
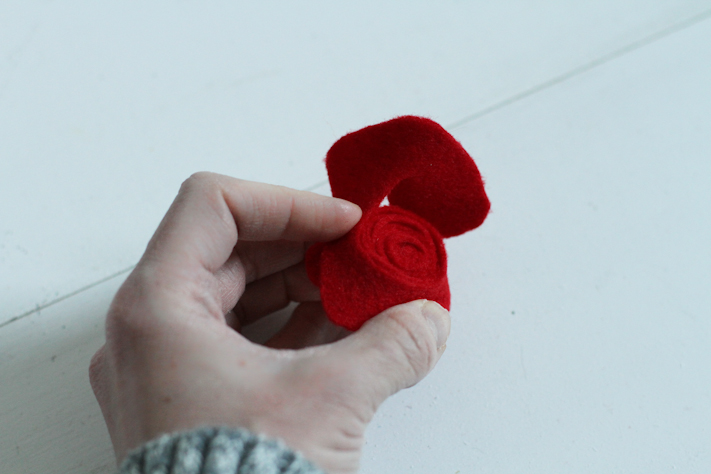 Take the underside of the rose, generously apply fabric glue and seal the rose with the remainder of the felt. The rose should have a flat back. Allow the glue to dry.
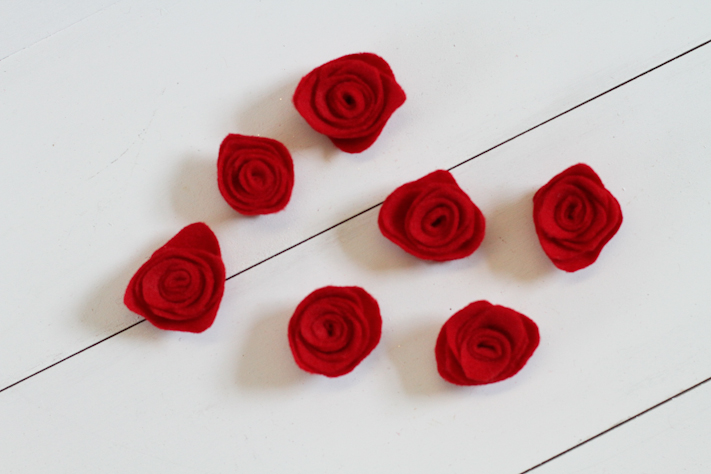
 And voilà, roses!
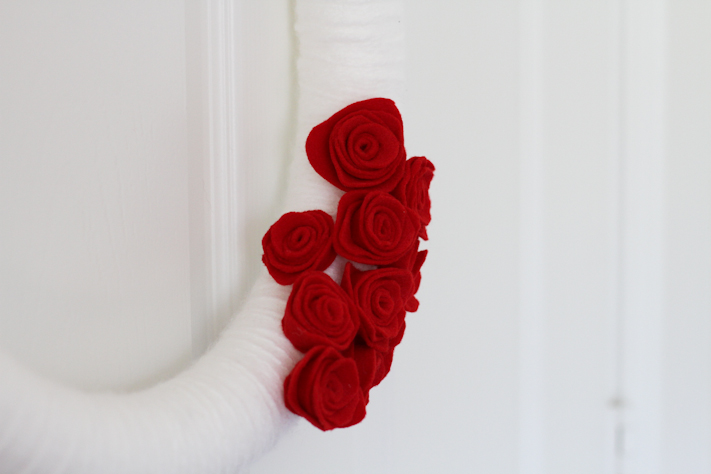
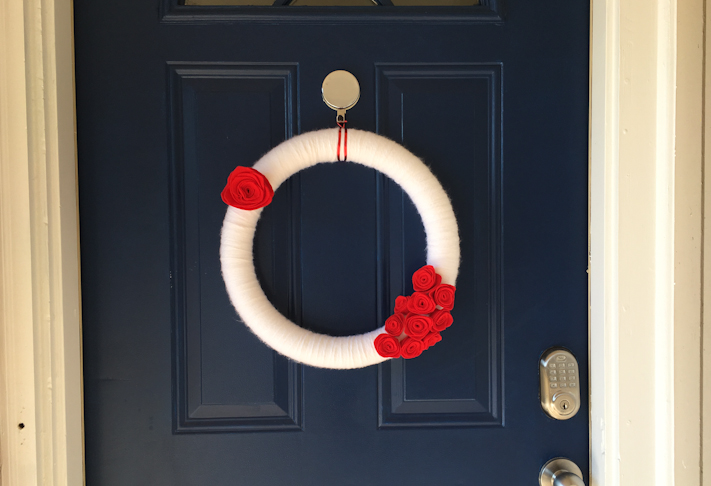
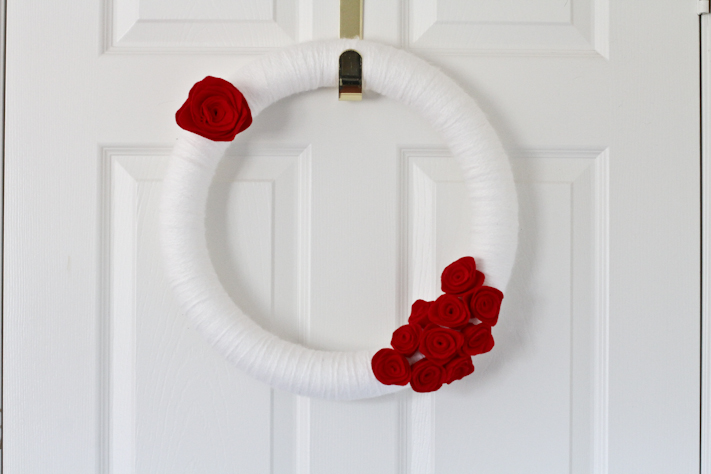
 Start applying all those pretty roses! I like them mostly in one area, but that’s just my opinion. Get creative with those roses and you do you, Boo!

DIY Valentine’s Day Wreath
Supplies:
- Foam wreath (or if you prefer heart shape foam wreath)
- Yarn
- Scissors
- Spray adhesive
- 3 Sheets of felt
- Fabric Glue
- Ribbon to hang wreath
Instructions:
- Tie a knot with yarn around the foam wreath. Begin wrapping the yarn tightly around the foam. After a few loops around the wreath, apply a little spray adhesive to first few loops of yarn to secure the placement.
- Continue wrapping the yarn tightly around the wreath until you have completely covered the foam.
- Wrap the yarn around for a second layer, but with the second pass being further spread out, about 1 cm between each loop of yarn. This adds extra thickness to the wreath.
- Tie a knot using the loose strand of yarn and a secured loop of yarn on the wreath. Cut the strand of yarn. Spray a small amount of spray adhesive to secure the knot.
- Create the felt roses: Cut out several small 3-5 inch squares of felt. Trim the corners of the square so the edges are rounded.
- Create a spiral cut around the square, working from the outside of the square towards the inside.
- Starting from the outside of the spiral, tightly wrap the felt to create the rose. (See pictures above for demonstration of this step.) Secure the rose by applying fabric glue to the back of the rose, and attaching the center of the felt spiral to the back of the rose. Allow to dry.
- Follow steps 5-7 but begin with one large 7 inch square of felt. Create one large accent rose.
- Glue the roses onto the wreath, as desired, using fabric glue.
- Attach a ribbon at the top and hang.
I tried this at different areas around the house…
…but will ultimately leave it inside.
Thank you for joining me today for this fun DIY Valentine’s Day wreath! Hope you come back soon!
Oh and a couple other Valentine’s DIY projects for more inspiration: picture frames and cocktail sticks.
Live your life joyfully so,
Ashley